
Month: March 2015
Negima Yakitori

It has long been a dream of mine to go to Japan. In fact when planning this trip, Japan was one of only five “must-visit” countries on my list. Something about the country takes me back to my childhood, when I used to watch documentaries about miraculous robots, seemingly-impossible gadgetry and toilets with myriad bum-cleaning settings. Ostensibly, to my young eyes, it looked like a glimpse into the future. Sadly, times have changed and as technology companies have upped the stakes, that seemingly-impossible gadgetry I once saw on Blue Peter and the like, looks pretty mundane by comparison. 10 year old me would be more dazzled by the now ubiquitous iPhone than by a toilet with a built in bidet and heated seat. But there is still much to marvel at in Tokyo and nowadays I find myself more drawn to the ancient rituals, shrines and dazzling architecture.
To my suprise I was most struck, not by all the things that make Japan so different from the UK, but instead the overwhelming parallels. Depite the obvious geographical similarities (we’re both island nations etc.), I was amazed by how similar we are culturally. A country steeped in heritage and history, sitting merrily beside modern convenience. The importance of manners. How their seemingly controlled exteriors bely a wicked sense of humour and a prediliction for dirty jokes. They drive on the left hand side of the road. They queue. For everything. And they do so with grace and patience. Did you know most North Americans I’ve met don’t even know what the word queue means?
But one key difference was the food. To western palettes some of the things I tasted could be challenging. Even simple confections are turned on their head, with wasabi flavoured jellies, red bean flavoured kitkats and fish-shaped waffles (known as Taiyaki) filled with purple sweet potato among them. I did however seek out the more recognisable aspects of Japanese cuisine. In Shinjuku I visited a decades old restaurant that specialises in the art of tempura making. The chefs work in an open kitchen opposite a diner-like bench of seating. The tempura itself: feather light, with a melt-in-the-mouth quality that I have yet failed to reproduce. But in the district of Asakusa, I tasted one of the ultimate street foods – Yakitori. Nothing is more gloriously simple or simply portable than meat on a stick.
The term Yakitori sometimes gets misused here on restaurant menus. Yakitori is comprised of two characters, Yaki (焼き) meaning to grill and Tori (鳥) meaning chicken. Simple in concept but difficult to master, this style of cooking is extremely economical as it uses all the parts of the chicken, from typical cuts like breast and thigh, to more adventurous options like liver and heart. The cuts of meat are prepared, marinated and grilled on skewers over hardwood charcoal. When other foods are used, like beef, pork, fish or seafood, they are called Kushiyaki (串焼き) meaning “grilled skewers”. The marinade for Yakitori is often extremely simple, utilising fundamental Japanese condiments. Here I have used the marinade to create a glaze for basting, which is infused with some aromatics.
Level: low
Methods: marinating, grilling
Time: 30 minutes (+ 2 hours marinating time minimum)
Makes: 12 skewers
Ingredients
460g skinless, boneless chicken thighs
6tbsp soy sauce
4tbsp sake
4tbsp mirin
1tbsp caster sugar
6-8 spring onions, root and loose leaves removed
2 garlic cloves, peeled and crushed with the heel of your hand
1tsp black peppercorns
12 bamboo skewers soaked in water
Method
1. Open out the chicken thigh fillets and cut into small cubes (around 1-inch/2cm). Place in a bowl.
2. Combine the soy sauce, sake and mirin in a jug. Pour the sauce over the chicken and allow to marinate for a few hours.
3. When ready, chop the spring onions into quarters.
4. Thread the skewers alternatively with pieces of chicken thigh and the spring onion.
5. Pour the remaining marinade into a small pan. Add the remaining spring onions, the sugar, garlic cloves and peppercorns. Bring to a boil and allow to reduce by half to make a shiny glaze.
6. Preheat the grill to medium and place the skewers under the heat for 5-6 minutes, turning frequently. Baste with the reduced glaze after each turn.
7. When the glaze has started to burnish and the chicken is cooked through, remove from the grill and serve.
Destination #37 / Tokyo, Japan (Shinjuku & Asakusa)

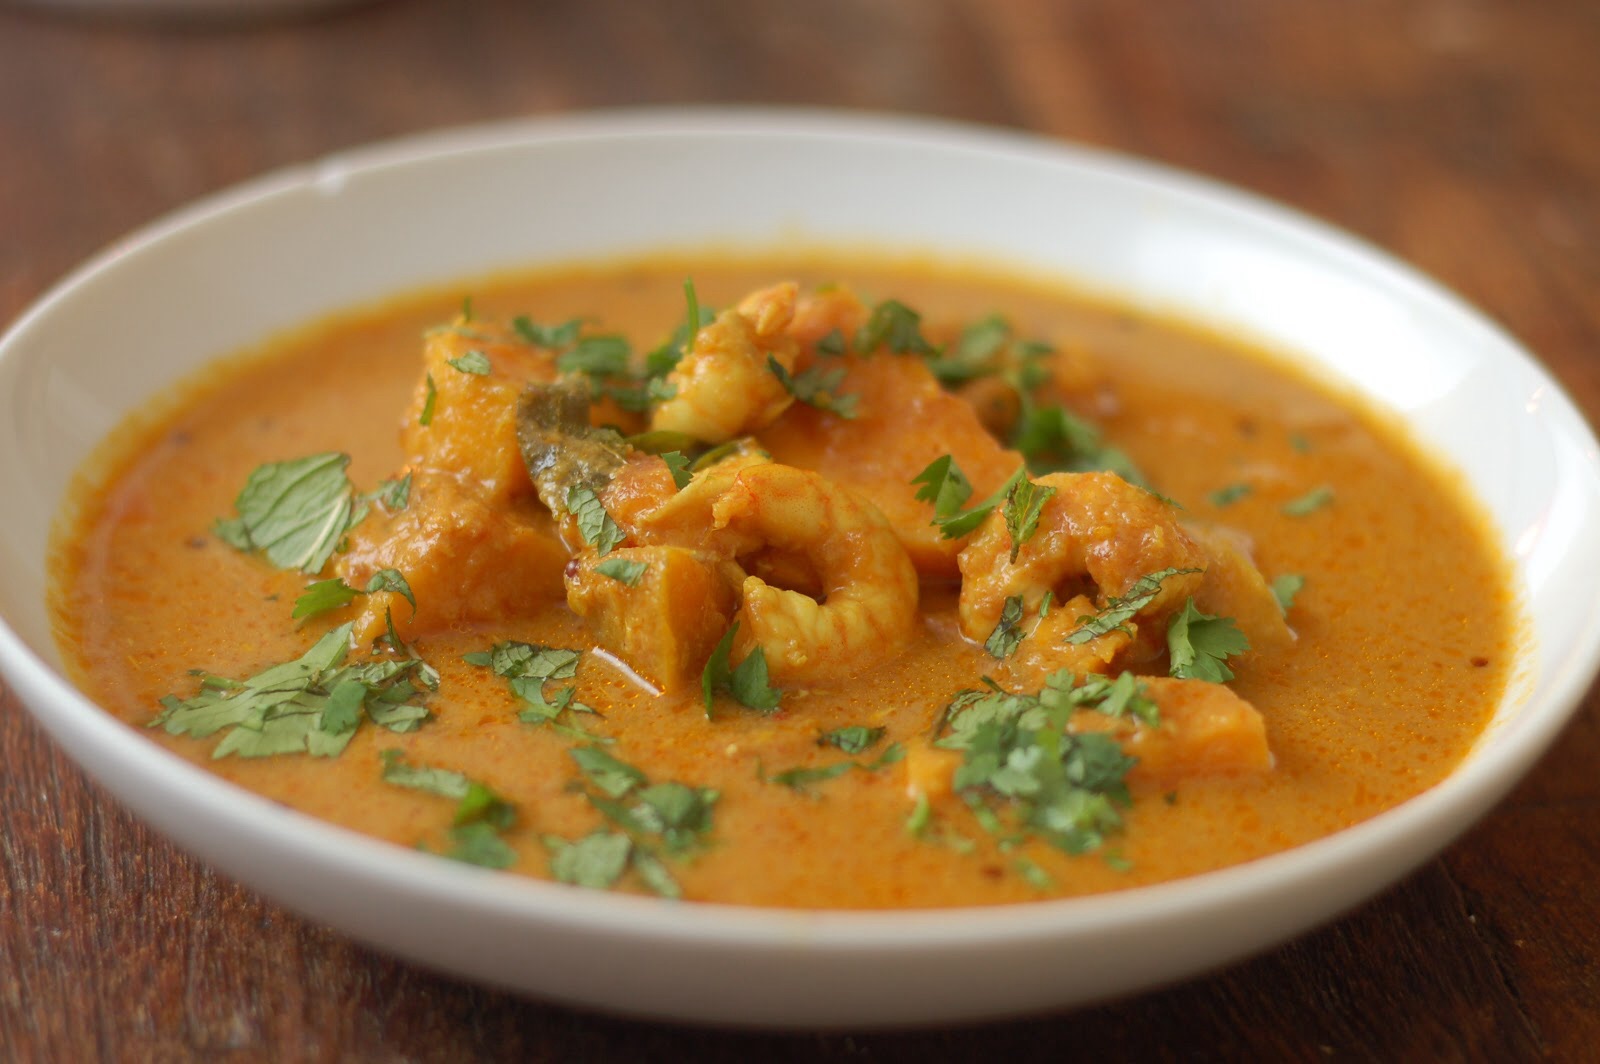
Tahitian Prawn Curry
The time I spent in Tahiti and Moorea, was enchanting. Its easy to see why this is such a popular Honeymoon destination. The beaches are beautiful, with crystal clear inviting water. The history is equally enthralling and the tiki statues dotted around the island lend a magical touch. Most important though is the lush vegetation. The peaked centres of each island (formed from underwater volcanic eruptions) are covered with beautiful swathes of verdant flora. And it is these trees, both indigenous and otherwise, the form the basis for Polynesian cuisine.
On a tour of the island I discovered that owning landis regarded as one of the most important things to Polynesian families, with plots being handed down from generation to generation. On each families plot you can find a combination of the five trees that bear the staple foods for their diet – breadfruit, banana, coconut, lime and papaya. Protein comes in the form of freshly caught seafood and organically reared chicken. The roots of this diet (which is surpringly high in fat and carbs) come from a time when locals were hunters, gatherers and fishers, and could easily burn off their consumed calories through their activities. However my guide informed me that modern islanders tend to buy their meat from a supermarket nowadays and have adopted a westernised sedentary lifestyle. Along with a distinctly relaxed attitude to life in general, this has meant that obesity is on the rise. Even in some of the most isolated places on earth, globalisation and commerciaism are having an impact.
Regardless of its calorific content, traditional Polynesian food is quite delicious. Poisson Cru, the national dish, is similar to south american cerviche but is augmented with coconut milk and served with local fruits. French influences are also understandably strong and I sampled a fresh seafood carppacio and white fish cooked en papillote (with banana leaves standing in for the usual baking parchment.) My favourite dish however, was an especially interesting fusion of flavours which I sampled at one of the many Rolloutes or food vans, dotted around Papeete: a Tahitian Chevrette Curry. Thats prawns to me and you. The dish is made using traditional south asian curry spices, but is made uniquely polynesian with the addition of coconut, lime, papaya and the delicate scent of Tahitian vanilla seeds. The idea of fruit and vanilla in a curry may sound challenging, especially when paired with seafood, but it really is quite delicious. Besides, there is only one way to find out…
Level: medium
Methods: tempering spices
Time: 1 hour 15 minutes
Makes: feeds 4
Ingredients
2tbsp vegetable oil
3 small sweet potatoes, peeled
1 onion
2 cloves garlic, peeled
1 mild red chilli, halved and deseeded
1 inch ginger, peeled
1tsp coriander
1tsp paprika
1/2tsp turmeric
1/2tsp cumin
1/2tsp fenugreek
1 cinnamon stick, broken
2 cloves
200 ml coconut milk
1 tsp vanilla seeds
500g prawns (frozen is fine)
1 pinches black pepper
3 papaya, peeled and cubed
juice of 1 lime
Method
1. Chop the sweet potato into large chunks, and boil in a large saucepan of boiling salted water for around 10 minutes or until tender. Drain.
2. Place the onion, garlic, chilli and ginger in a small food processor and blitz to make a paste.
3. Heat the oil in a clean wok and gently fry the dry spices for 30 seconds or until they release their aroma. Then add the onion paste and fry for a further 3-4 minutes.
4. When softened, add the coconut milk and bring to a simmer. Do not boil.
5. Stir in the vanilla seeds and prawns. Simmer together for 4-5 minutes and season.
6. Add the cooked sweet potato and cook for a further few minutes.
7. Stir in the papaya and lime juice. Remove the clove and cinnamon.
8. Garnish with spring onion or chopped coriander and serve with plain boiled rice.
Destination #36 / Tahiti & Moorea, French Polynesia

Hokey Pokey Ice Cream

If the north island had been about adrenaline-fuelled adventure, the south island was an entirely more relaxing affair. Whilst there, I bonded with my new friends on the crystal-clear coastline of Kaiteriteri, dressed up and danced the night away at the affectionately named Poo Pub in Mahinapua, scaled a glacier in Franz Josef, drank my body-weight in alcohol in Queenstown and wondered at the innovative town centre of Christchurch where packing containers double as shops, during the slow recovery from the devastating 2011 earthquake. And for anyone who has been to Queenstown, yes, I did try a Fergburger and frankly it was delicious. By the time I hit Kaikoura I had said goodbye to the majority of my friends as I made an accelerated rush back to Auckland for my next flight. After almost a month with my new friends, it was a difficult experience parting, but one I am destined to repeat during my ongoing travels.
The weather in the south island was marginally better than the north during our stay, and there were a mixture of hot and cold days. On those hot days many of my fellow travellers would indulge in ice cream, to stave off the heat. Although I rarely did the same, the budget situation being what it was, I did taste what I believe to be the most kiwi of all the ice cream flavours – Hokey Pokey. Hokey Pokey is, as any readers from south west England will know, another name for honeycomb. This shimmering, supersweet confection is held in high regard in NZ and can be purchased at many a souvenir outlet. The idea of combining it with rich, creamy vanilla ice cream seemed too decadent to comprehend, yet somehow the two counterbalanced eachother, providing a marvellous summer snack. The Hokey Pokey, lost some of its tooth-shattering hardness, yielding slightly in its new vanilla scented home. The overt sweetness also helped to somehow alleviate the cloying richness of the ice cream. Quite a treat indeed.
I have decided to share with you my recipe for no-churn ice cream, as well as homemade hokey pokey. I think the recipe for the ice cream originally came from the UK Good Food magazine, so I give them credit here. The ice cream is a breeze to make, but is a tad sweeter than most and must be consumed within a few days – consider that a challenge if you must! If you don’t fancy giving this time saver a try, then feel free to make your own favourite recipe, or even buy a good vanilla ice cream from the shops. The hokey pokey can be added half way through the freezing process as I have done here, or crumbled generously over the ice cream before serving.
Level: easy
Methods: whisking, caramel production
Time: 5 hours minimum (including freezing)
Makes: feeds 8-10
Ingredients
For the ice cream:
1/2 397g can condensed milk
600ml pot double cream
1tsp vanilla extract
For the Hokey Pokey:
100g caster sugar
4tbsp golden syrup
1 1/2tsp bicarbonate of soda
Method
1. Put the cream into a large bowl and whisk for a minute until it has begun to thicken.
2. Add the condensed milk and vanilla, then continue whisking until stiff peaks have formed. Do not over whisk however or the mixture will seperate and become greasy.
3. Scrape the mixture into a loaf tin or plastic tub, cover with cling film and freeze until solid (about 4-5 hours.)
4. Meanwhile, to make the Hokey Pokey, put the sugar and syrup into a saucepan and stir together.
5. Place the pan over a medium heat and allow to melt. Do not stir at this point!
6. When the mixture is bubbling and has the coppery colour of maple syrup, remove from the heat. This should only take 3-4 minutes.
7. Immediately whisk in the bicarbonate of soda and watch as the syrup erupts into an aerated golden cloud. Caution the mixture is still inordinately hot, so handle with care.
8. Turn the mixture onto a piece of good quality baking parchment or heavily greased foil. Allow to harden and cool.
9. Once set, bash the honeycomb until it shatters into glistening shards no bigger than a 10 pence piece.
10. Remove the ice cream from the freezer and delicately fold in as much (or little) of the Hokey Pokey as you wish. Replace until solid.
11. The ice cream is fairly soft for the first few days, but it is still preferable to remove from the freezer for 15 minutes before consumption to allow it to soften further.
Destination #35 / The South Island, New Zealand (Kaiteriteri ~ Lake Mahinapua ~ Franz Josef ~ Queenstown ~ Christchurch ~ Kaikoura)

Kiwi Pavlova

The remainder of my time on the north island, was hectic and adrenaline fuelled. Starting slowly, we made a trip to Hobbiton, the set used in the Lord of Rings movies. Although I have watched all six of the Peter Jackson-helmed films, I never considered myself a rabid fan, but the set visit was a real highlight. From there it was in to Rotorua where I visited a Maori village, where I was elected Chief of the visiting tribe by my fellow travellers. This meant I had to greet the villages Chief, dance the Haka and sing a song native to my homeland. I chose Wannabe by the Spice Girls, naturally! Next, we ventured on to Taupo where I hiked 12 miles up and along a volcanic ridge, in the shadow of mount doom. That same day I dove out of a plane at 12,000 feet. Frankly the experience was one of the most mind-blowing and exciting of my travels so far, though quite honestly my friends and I were so exhausted from the hike that it all felt a little dreamlike. We ended our north island tour in Wellington, where we stayed for three days for a well deserved rest.
During this period of my travels I was in extreme money saving mode – jumping out of planes isn’t cheap. So a lot of the time I ate instant noodles, peanut butter sandwiches or cooked cheap meals like bolognese and burritos. I did enjoy one superb meal however, when visiting the Maori village. Known as a Hāngi, the meal consisted of roasted meats and vegetables, that had been cooked in an underground fire pit. This process lent the food a moreish smokey quality, that went surprisingly well with the Anglo-Kiwi additions of stuffing and gravy. As much as I would love to include these recipes on my blog, I do not feel adequetly experienced to teach you all how to make a fire pit in your back garden. Instead I will focus on the dessert – the Pavlova. The Kiwis and the Aussies have long contested the origins of this simple meringue based dish, but I tend to side with the people of New Zealand on this one.
In order to make a pavlova, with the necessary billowy, mallow like centre is simple. The addition of vinegar and cornflour is all it takes to make a soft, chewy meringue. And to top it all off – what could be more authentic than the Kiwi fruit!
Level: easy
Methods: whisking method, italian meringue
Skills: baking
Time: 4 hours (including cooling time)
Makes: feeds 8-10
Ingredients
For the meringue:
4 egg whites
250g caster sugar
1 tsp white wine vinegar
1 tsp cornflour
1 tsp vanilla extract
For the topping:
2-3 kiwi fruit, skinned and sliced horizontally
2-3 passion fruit, seeds and pulp only
2 tbsp icing sugar
350ml double cream
Method
1. Preheat the oven to 130C.
2. Using a pencil, mark out the circumference of a dinner plate on baking parchment.
3. Whisk the egg whites with a electric hand mixer until they form stiff peaks, then whisk in the sugar, 1 tbsp at a time, until the meringue looks glossy and stiff peaks form.
4. Quickly whisk in the vinegar, cornflour and vanilla.
5. Spread the meringue inside the circle, creating a crater by making the sides a little higher than the middle. (Kiwi Pavlovas tend to be tall with straight sides like those in the picture.)
6. Bake for 1 hr, then turn off the heat and let the Pavlova cool completely inside the oven.
7. When the meringue is cool, whip the cream and icing sugar together, to form soft peaks. Spread it over the meringue.
8. Arrange the kiwi fruit slices on top of the cream and then haphazzardly drizzle over the passion fruit pulp.
Destination #34 / The North Island, New Zealand (Hobbiton ~ Rotorua ~ Taupo ~ River Valley ~ Wellington)

Fush’n’Chups Burger

New Zealand, for me, was something of a holiday within a holiday. The 28 days I spent there I will always remember fondly. Whether because of the beautiful yet schizophrenic landscape, the copious adventurous activities or the great friends I made. But there are things about New Zealand that are less appealing, namely the fact that everything is so darn expensive. You even have to pay for wifi, which is spotty at best. It is for this reason that I am so far behind on my blog entries and why I have made the decision to post just three entries for this stunning country. That and the fact that I was travelling by tour bus, staying in hostels and genuinely couldn’t find the time or peace to write.
Upon arriving to the north island, I first made my way to the northern most tip, stopping overnight at a beautiful coastal town known as Paihia. The surrounding landscape allowed for some beautiful hikes, accompanied by increasingly beautiful views of the bay of islands. The bay itself was home to numerous small pods of dolphins, who could be spied remotely if lucky, or seen close up on a tour boat for a reasonable fee. The next day we travelled to Cape Reinga, where the Tasman Sea and the Pacific Ocean merge, creating huge swells. Here I tried sandboarding for the first time, and despite the effort of slogging up the sand dune in the heat and the friction burns on my feet, it was a fun experience and my first taste of action in New Zealand.
It was on my return journey from Cape Reinga, that I first sampled kiwi Fish and Chips (or Fush’n’Chups to use the local vernacular.) It was also the first time I would sit and share a meal with the two people who would become my travel companions and friends for the next four weeks, though at the time we only spoke briefly. The meal itself was much as you would expect, the fish was freshly caught and exquisitely delicate. The batter was lighter than that we consume at home, falling somwhere inbetween beer batter and a tempura. The chips were the only disappointment, as they were clearly fried from frozen and had none of the limp, greasy character that (for some reason) we Brits take such pride in.
From Paihia it was a short hop back to Auckland, where I found inspiration from a local burger chain, who serve their Fush’n’Chups in a bun – a Fish and Chip butty if you will. Taking inspiration from this I started formulating my first recipe. In an effort to include new methods on my blog, I will not be posting details on how to make the chips or indeed the bun. Focusing instead on how to make the light crisp fish fillet and the requisite tartare sauce accompaniment.
(And I haven’t even gotten round to mentioning the spectacular black water rafting in Waitomo, where I floated through underground cave systems, lit up with thousands of glow worms…)
Level: medium
Methods: emulsion sauce, batter
Skills: deep-frying
Time: 1 hour
Makes:4 burgers
Ingredients
For the tartare sauce:
1 free-range egg yolks
1 tsp French mustard
¼ lemon, juice only
¼ tsp caster sugar
150ml vegetable oil
Salt and freshly ground black pepper
1 tbsp capers, drained and chopped
1 tbsp gherkins, drained and chopped
1 tbsp finely chopped shallot
1 tbsp chopped fresh parsley
For the fish:
sunflower or vegetable oil, for frying
100ml beer, chilled
100ml cold water
140g self-raising flour
1tsp dill, chopped finely
25g cornflour
4 white fish fillet portions, approx 300g
For the burger:
a handful of chips, fried or baked
4 burger buns
quarter head of iceberg lettuce, shredded
Method
1. Blend all of the mayonnaise ingredients except the oil in a food processor for 10-15 seconds, or until well combined. While the motor is running, pour the oil into the food processor very slowly until well combined and the mixture is thick and glossy.
2. Season, to taste, with salt and freshly ground black pepper. At this point you may divide up the mayonnaise, keeping some, unadulaterated, for another recipe.
3. To the mayonnaise, add the capers, gherkins, shallot and parsley, then cover and refridgerate until needed.
4. Cook the chips according to your own preference. (I prefer to prepare thick-cut chips, parboil them for six minutes and then roast at 200C for thirty minutes in a light coating of vegetable oil.)
5. Next preheat a free standing deep fryer to 170C.
6. Whisk the beer and cold water into the self-raising flour with a pinch of salt. Stir the batter well, but do not overmix. Add the finely chopped dill fronds and combine.
7. Dust the fish with cornflour, then dip into the batter.
8. One at a time, lower into the hot oil (two per batch).
9. Cook for 4-5 mins, turning once.
10. When cooked, drain on kitchen paper. Then cook the other two fillets.
11. To assemble the burgers/butties, split the buns and top with some lettuce, three or four chips, the fish and a dollop of the tartare sauce.
